
How to Draw a Five-Pointed Star
Stars are common symbols shown of flags; however, it was the thirteen star U.S. flag which first used stars to symbolize political and geographic areas. Nevertheless, the five-pointed stars displayed on the U.S. flag have always been difficult and time-consuming to make. How many piece of material does it take to make a pieced U.S. flag with appliquéd stars? Although it may surprise some, there are 114 pieces of cloth that must be sewn together to construct a United States flag. Thirteen red and white stripes, one piece of blue cloth for the union—and one hundred stars, fifty on the front and another fifty on the back.
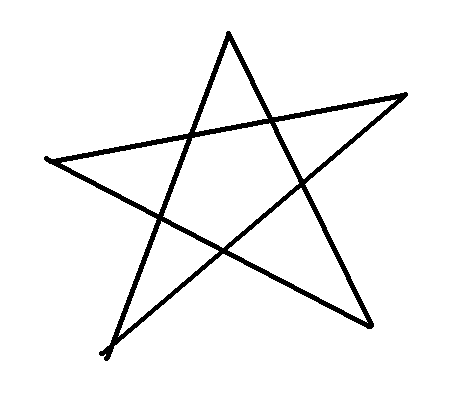 Flag makers have some tricks to make stars; however, if you want to draw a U.S. flag how can you draw a respectable star of the size you need to make things look right? Children learn to quickly draw stars with five pencil lines, but they usually look pretty crude. Three ways to draw stars of various sizes are shown below.
A simple and easy way to draw a respectable looking five-pointed star only requires a strip of paper. If you want to make a star with an approximate diameter of two inches, cut a strip of paper one inch wide and about eight inches long. If you want to make a one inch diameter star, a strip one half inch wide and about four inches long will work nicely. Now tie the paper strip into a loose overhand knot. Slowly tighten it and snug the knot tighter until it worms a pentagon with, a five sided figure, with each side equal to the width of the strip. You can cut the ends shorter or simply fold them out of the way to form a simple by nice pentagon. Put the pentagon knot on a piece of paper and trace the five equal sides or simply mark a dot on the paper at each of the five corners of the pentagon. Now it is a simple task to use a ruler to draw a five pointed star by connecting the five dots or the five corners of the pentagon. You can carefully cut this star our and use if for a pattern.
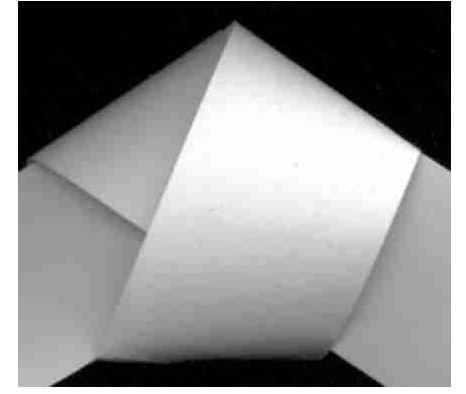
Fold a strip of paper to make a petagon you can use to draw a five-pointed star.
The simplest and most accurate way to draw a perfect five pointed star requires a compass, protractor and ruler. Using the compass draw a circle of the exact diameter you want the star to have. Make sure to mark the center of the circle clearly as you draw the circle. Then mark a point at the top of the circles arc. Using the ruler, draw a line from the center point of the circle through the park you made at the top of the circle. Place the center mark of the protractor on the exact center of the circle, place 0° on the line drawn and measure 72° to the left and to the right of the line drawn to the top of the circle. Using your ruler, connect the center of the circle and the point marking 72°. Draw a line that crosses the arc of the circle on the 72° line. Do this on both the left and right. Then measure another 72° from theses two lines. This is identify the point on the arc of the circle 144° from the top mark and cut the arc of the circle into five equal segments. The arc of the circle between the two 144° points should also measure 72 degrees if you have measure correctly. Connect the five points and you will have a perfectly drawn five pointed star.
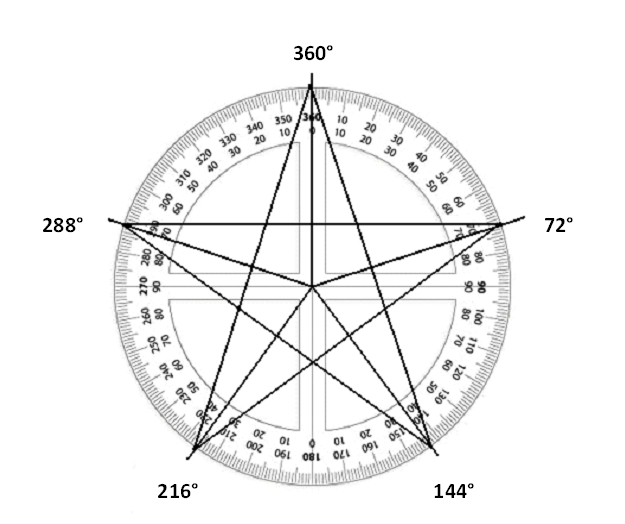
A protractor can be used to mark every 72 degree segment of a circle. Use these five points to draw a perfect five-pointed star.
For the savvy student of geometry, a perfect five pointed star can be drawn using only a ruler and a compass. First draw a vertical and a horizontal line on the paper that meet at a 90° angle. Placing the point of the compass at the intersection of the two lines, draw a circle with the diameter of the star you want to produce. Find the midpoint of the radius line running from the center to the arc of the circle on the right side of the circle. Placing the pivot point of the compass on the midpoint of this radius line on the right side, set the compass to measure the distance to the point on the circle where the vertical line crosses the arc of the circle at the top. Swing the compass point holding the pencil down to mark the point on the left side’s radius this same distance that you measured to the top of the circle. Now move the compass to the point on the top of the circle where the vertical line crosses the arc. Adjust the compass to measure the distance from the top of the circle to the point you marked on the left radius. Your compass now is set to measure 1/5 of the circle’s circumference. Use the compass set at this measurement to mark to mark the arc of the circle at five points on the circle which are equal distance apart as they run around the circle. Finally, use your ruler to draw a straight line between every other of these five marks. However, if this is too complex for you—use one of the two procedures shown above.
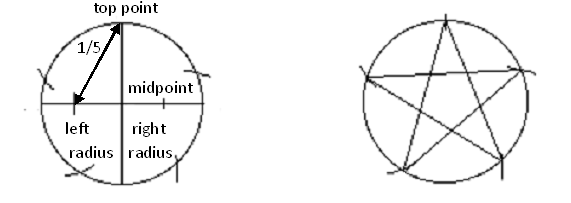
It is complicated, but a five-pointed star can be drawn using only a compass and a ruler.